Creating a Node.js CLI and Publish

Full Stack Developer with a strong background in building web applications using React, Node.js, GraphQL, SQL, and MongoDB technologies. Skilled in creating responsive user interfaces using React and managing data flow using Redux. Proficient in Node.js and Express for building server-side applications and integrating with databases such as MongoDB and SQL. Strong understanding of GraphQL for building efficient and flexible APIs. Experience with MongoDB and SQL databases for data management and querying. Familiar with web development principles, including HTML, CSS, and JavaScript. Proven ability to deliver high-quality, scalable, and reliable web applications. Strong problem-solving skills and attention to detail. Committed to staying up-to-date with the latest web development trends and technologies.
Would you like to create a CLI (Command Line Interface) application with your friends? Follow these steps to get started:
Create a new directory for your CLI app :
 mkdir cli-app
 cd cli-app
 npm init
Install the necessary packages for beautiful text and colors:
npm install chalk chalk-animation figletCreate a new file named
index.js
touch index.jsAdd the following line at the top of the
index.jsfile:
The line#!/usr/bin/env nodeat the beginning of a JavaScript file is called a shebang line. It instructs the system to use the Node.js interpreter to run the script.#!/usr/bin/env nodeCreate an Immediately Invoked Function Expression (IIFE) to begin the script. Let's start by using Figlet:
 (async () => {
     await figlet.text(
         "Hey There",
         {
             font: "Standard",
             horizontalLayout: "default",
             verticalLayout: "default",
             width: 70,
             whitespaceBreak: true,
         },
         function (err, data) {
             if (err) {
                 console.log("Something went wrong...");
                 console.dir(err);
                 return;
             }
             console.log(data);
         }
     );
 })();
 // Figlet offers extensive documentation for further customization.
Now, let's utilize chalk with simple
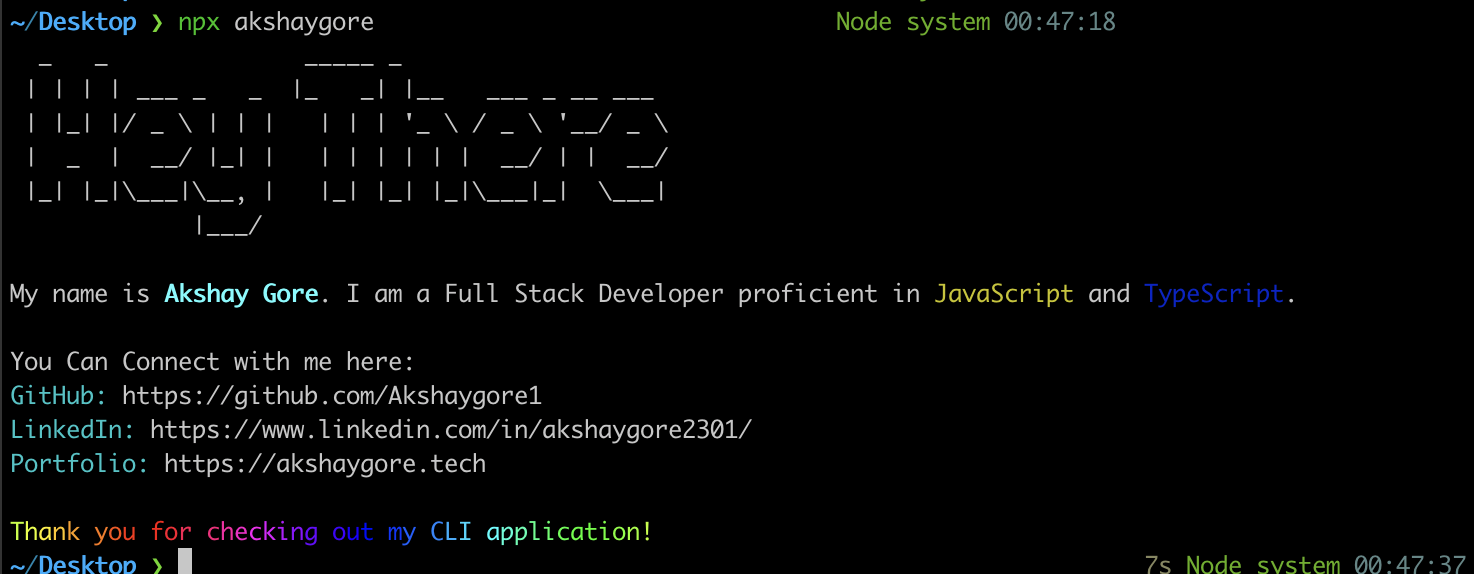
console.log()statements and template literals to customize the console logs :let Github = "https://github.com/Akshaygore1"; let Linkedin = "https://www.linkedin.com/in/akshaygore2301/"; let Portfolio = "https://akshaygore.tech"; let bio = `My name is ${chalk.bold.cyan( "Akshay Gore" )}. I am a Full Stack Developer proficient in ${chalk.yellow( "JavaScript" )} and ${chalk.blue("TypeScript")}.`; console.log(`\n${bio}`); console.log("\nYou Can Connect with me here:"); console.log(chalk.cyan("GitHub:"), Github); console.log(chalk.cyan("LinkedIn:"), Linkedin); console.log(chalk.cyan("Portfolio:"), Portfolio); // Here, I've added my socials links and used chalk to provide font colors. // You can also set background colors using chalk.Now, let's add some animation using chalk-animation for the closing words:
 let rainbow = chalkAnimation.rainbow(
     `
             Thank you for checking out my CLI application!`
 );
 // This part creates an animation effect for the closing words using chalk-animation.

 await new Promise((resolve) => setTimeout(resolve, 5000));
 // Adjust the time delay as needed.
 rainbow.stop();
Run
node index.jsto see the changes in the UI.Finally, to publish your package to npm, make changes in
package.json:"bin": { "app-name": "index.js" } // Create an npm account and run npm login // then after login just run npm publish npm publishOnce your package is published, you can run the command using the name specified in
package.json. For instance, in my case, it'sakshaygore, so I would run:npx akshaygoreAnd there you go! You have your CLI bio ready to share with your friends. If you encounter any issues during the creation process, feel free to run the above command and connect with me on social media. I'm happy to assist you!
Your feedback on my blog is much appreciated. Let me know how I can improve it further!


