Creating a Simple Weather App: A Step-by-Step Guide with HTML, CSS, and JavaScript

Full Stack Developer with a strong background in building web applications using React, Node.js, GraphQL, SQL, and MongoDB technologies. Skilled in creating responsive user interfaces using React and managing data flow using Redux. Proficient in Node.js and Express for building server-side applications and integrating with databases such as MongoDB and SQL. Strong understanding of GraphQL for building efficient and flexible APIs. Experience with MongoDB and SQL databases for data management and querying. Familiar with web development principles, including HTML, CSS, and JavaScript. Proven ability to deliver high-quality, scalable, and reliable web applications. Strong problem-solving skills and attention to detail. Committed to staying up-to-date with the latest web development trends and technologies.
In a tech world dominated by frameworks and libraries, it's essential to grasp the inner workings of web development. Today, we're going to create a straightforward weather app using only HTML, CSS, and JavaScript. We'll also use a free weather API – in this case, I've chosen the one provided by https://www.weatherapi.com, but you're free to pick any other API that suits your needs.
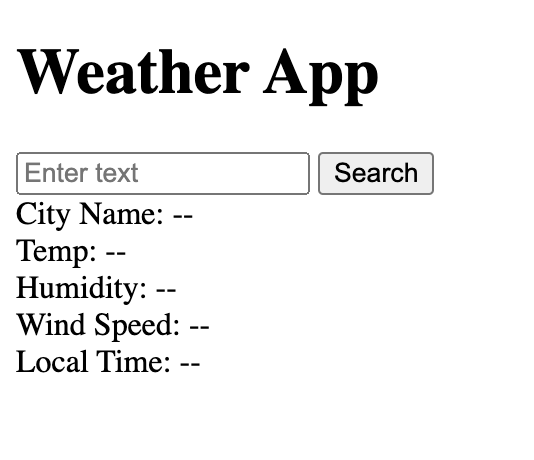
Let's kick things off by crafting an HTML file with a standard boilerplate code. We'll then create a basic card structure featuring an H1 tag with "Weather App" and some data points. To keep things simple, we'll start with hard-coded values to get the app up and running.
<!DOCTYPE html>
<html lang="en">

<head>
    <meta charset="UTF-8">
    <meta name="viewport" content="width=device-width, initial-scale=1.0">
    <meta name="description" content="Weather App">
    <title>Weather App</title>
</head>
<body>
    <div class="container">
        <h1>Weather App</h1>
        <div class="card-container">
            <div class="search">
                <input type="text" class="input-text" placeholder="Enter text">
                <button id="myBtn">Search</button>
            </div>
            <div class="name-temp">
                <div class="cityName">City Name: --</div>
                <div class="temp">Temp: --</div>
            </div>
            <div class="humidity">
                Humidity: --
            </div>
            <div class="wind-speed">
                Wind Speed: --
            </div>
            <div class="LocalSpeed">
                Local Time: --
            </div>
        </div>
    </div>
</body>
</html>
Now that we've set the stage for our weather app using HTML, it's time to add a touch of beauty to the interface. While I'll make some basic changes, you have the creative power to design the card and give it your unique flair.
create and link files to the HTML.
<link rel="stylesheet" href="style.css">
.card-container {
  width: 300px;
  margin: 0 auto;
  border: 1px solid #ccc;
  border-radius: 5px;
  box-shadow: 0 0 5px 0 rgba(0, 0, 0, 0.2);
  background-color: #fff;
}

.search {
  display: flex;
  align-items: center;
  padding: 10px;
}

.search input {
  width: 100%;
  border: 1px solid #ccc;
  border-radius: 5px;
  padding: 5px;
}

.search button {
  background-color: #000;
  color: #fff;
  border: none;
  border-radius: 5px;
  padding: 5px;
  margin-left: 10px;
}

.name-temp {
  display: flex;
  justify-content: space-between;
  align-items: center;
  padding: 10px;
}

.cityName {
  font-size: 20px;
  font-weight: bold;
}

.temp {
  font-size: 16px;
}

.humidity,
.wind-speed {
  padding: 10px;
}

.humidity,
.wind-speed span {
  color: #999;
}

.wind-speed {
  padding-bottom: 10px;
}

.LocalSpeed {
  padding: 10px;
}

"Unleashing the Magic: Adding JavaScript to our Weather App"
The real enchantment begins now as we introduce JavaScript to our HTML file. However, we'll do so with a twist to ensure the smooth execution of our code. We'll use the <script> tag with the 'defer' attribute to ensure that JavaScript runs after the HTML content has loaded. Stay tuned because I'll be writing a blog soon explaining the difference between 'defer' and 'async' – important concepts for web development.
With JavaScript, we'll make our weather app come to life, providing real-time data and interactivity. So, let's proceed and see the magic unfold!
<script src="index.js" defer></script>
// Function to fetch weather data
const fetchWeather = async (cityName) => {
    const API_KEY =
    const apiUrl = `http://api.weatherapi.com/v1/current.json?key=${API_KEY}&q=${cityName}&aqi=no`;
    const response = await fetch(apiUrl);
    const data = await response.json();

    if (data && data.location && data.current) {
        let cityName = data.location.name;
        let temperature = data.current.temp_c;
        let humidity = data.current.humidity;
        let windSpeed = data.current.wind_kph;
        let localTime = data.location.localtime;

        document.querySelector(".cityName").innerHTML = "City Name: " + cityName;
        document.querySelector(".temp").innerHTML = "Temp: " + temperature + "°C";
        document.querySelector(".humidity").innerHTML = "Humidity: " + humidity + "%";
        document.querySelector(".wind-speed").innerHTML = "Wind Speed: " + windSpeed + " Km/h";
        document.querySelector(".LocalSpeed").innerHTML = "Local Time: " + localTime;
    }
};

document.addEventListener("DOMContentLoaded", function () {

    const inputText = document.querySelector(".input-text");
    const searchBtn = document.getElementById("myBtn");

    searchBtn.addEventListener("click", () => {
        const cityName = inputText.value;
        fetchWeather(cityName);
    });
});
Certainly, let's break down the code you've provided step by step:
const fetchWeather = async (cityName) => { ... }:- This code defines an asynchronous function named
fetchWeatherthat takes acityNameas a parameter. This function will fetch weather data for the specified city.
- This code defines an asynchronous function named
const API_KEY = ...:- This is where you should define your Weather API key. You'd replace
...with your actual API key from the Weather API service.
- This is where you should define your Weather API key. You'd replace
const apiUrl = ...:- This constructs the URL for making the API request. It includes the API key and the city name. The API endpoint for fetching weather data is from "http://api.weatherapi.com."
const response = await fetch(apiUrl);:- This line makes an HTTP request to the URL constructed earlier using the
fetchfunction. Theawaitkeyword is used to pause execution until the promise returned byfetchresolves.
- This line makes an HTTP request to the URL constructed earlier using the
const data = await response.json();:- After receiving the response from the API, this line extracts and parses the JSON data. Again,
awaitis used to wait for the response to be processed.
- After receiving the response from the API, this line extracts and parses the JSON data. Again,
if (data && data.location && data.current) { ... }:- This condition checks if the data received from the API is valid and contains the necessary information. It ensures that
locationandcurrentdata objects exist.
- This condition checks if the data received from the API is valid and contains the necessary information. It ensures that
The following lines extract data from the API response:
cityName,temperature,humidity,windSpeed, andlocalTimeare assigned values from thedataobject.
The next set of lines updates the HTML content to display the retrieved weather data. It uses
document.querySelectorto select specific elements in the HTML document and sets theirinnerHTMLproperty with the corresponding weather information.The code waits for the DOMContentLoaded event to ensure that the JavaScript is executed after the HTML document is fully loaded. This is crucial to ensure that HTML elements you're trying to interact with exist at the time the JavaScript code runs.
const inputText = document.querySelector(".input-text");:- This line selects an HTML element with the class "input-text," which is presumably an input field where the user can type in a city name.
const searchBtn = document.getElementById("myBtn");:- This line selects an HTML element with the id "myBtn," which is presumably a button element.
searchBtn.addEventListener("click", () => { ... }:- This code adds a click event listener to the "myBtn" button. When the button is clicked, the provided function is executed.
const cityName = inputText.value;:- This line retrieves the value entered by the user in the input field (presumably the city name) and assigns it to the
cityNamevariable.
- This line retrieves the value entered by the user in the input field (presumably the city name) and assigns it to the
fetchWeather(cityName);:- This line calls the
fetchWeatherfunction with thecityNameas an argument when the button is clicked. It initiates the process of fetching and displaying weather data for the specified city.
- This line calls the
In summary, this code defines a function to fetch weather data from an API, listens for a button click event, and initiates the API request when the button is clicked. It then updates the HTML content with the retrieved weather information.
In this blog, we've taken a step-by-step journey into creating a weather app from the ground up using HTML, CSS, and JavaScript. We've learned how to make an asynchronous API request, process the data it returns, and display it in our web interface. With this fundamental understanding, you're well on your way to exploring more complex web applications and gaining a deeper insight into web development. So, whether you're just starting out on your coding adventure or looking to expand your knowledge, remember that understanding the core principles empowers you to create and innovate in the ever-evolving world of web development. Keep coding, keep learning, and watch your projects come to life!


